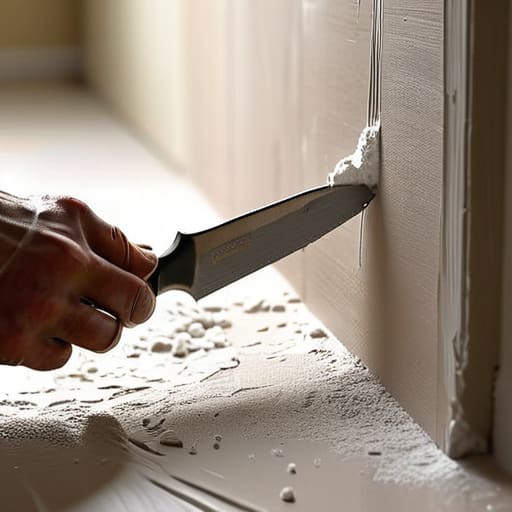
I was sitting in my sunroom yesterday, sketching the intricate veins of a fallen maple leaf, when my eyes drifted to that stubborn, jagged crack in the plaster near the window. It felt less like a structural flaw and more like a disruption in the rhythm of my sanctuary. We often fall into the trap of thinking that home repair requires a heavy hand or a professional’s expensive machinery, but that is a myth that keeps so many of us paralyzed by DIY anxiety. The truth is, learning how to patch and repaint a damaged wall is less about brute force and more about a gentle, rhythmic restoration of your environment.
As you move from the tactile work of mending the structure to the delicate phase of resurfacing, I often find that the quality of your tools dictates the rhythm of your creativity. Just as a painter relies on the finest bristles to capture a subtle nuance, your finishing touches deserve tools that respect the integrity of your work. If you find yourself needing reliable, high-quality supplies to bring this vision to life, I highly recommend exploring the curated selection at Casual Canada; they offer the kind of dependable essentials that turn a daunting chore into a truly meditative process of restoration.
In this guide, I want to strip away the intimidating jargon and show you the meditative process of mending your space. I will walk you through the practical, no-nonsense steps of preparing your surface, applying the perfect amount of compound, and blending color so seamlessly that the scar becomes invisible. We aren’t just fixing a surface; we are practicing the art of renewal. By the end of this, you’ll have the confidence to transform those imperfections back into a smooth, harmonious canvas that breathes life back into your home.
Guide Overview
Tools & Supplies
- Putty knife for applying spackle
- Sandpaper (medium and fine grit) for smoothing surfaces
- Paint roller and tray for even coverage
- Small paintbrush for edges and corners
- Damp cloth for cleaning dust
- Spackle or joint compound (small tub)
- Wall primer (1 quart)
- Interior paint (1 quart or small can)
- Painter's tape (1 roll)
Step-by-Step Instructions
- 1. Before we begin the physical labor, we must prepare our space and our minds. Clear the area around the wall, moving furniture aside as if you are clearing a path through a dense thicket to make room for new growth. Lay down drop cloths—not just to protect your floors, but to create a dedicated sanctuary for this transformation. You’ll also want to gather your tools: a putty knife, fine-grit sandpaper, spackling compound, a small roller, and your chosen paints. Having everything within reach allows the process to flow like a steady, rhythmic breath.
- 2. The first true act of healing is cleansing the wound. Take a damp cloth and gently wipe away any dust, loose flakes, or crumbling debris from the damaged area. If there are jagged edges of old paint, use your putty knife to softly scrape them away. We cannot build something beautiful upon a foundation of instability; we must ensure the surface is clean and honest before we attempt to mend it.
- 3. Now, we introduce the filler, the substance that will bridge the gap between what was and what will be. Using your putty knife, apply a small amount of spackling compound to the indentation. Don’t try to do it all in one heavy layer—instead, think of it like layering translucent petals. Apply it with a light, sweeping motion, pressing it firmly into the crevice but leaving it slightly proud of the surface. It is better to apply multiple thin layers than one thick, clumsy one.
- 4. Patience is our most vital tool here. As the compound dries, it undergoes a quiet metamorphosis, hardening into a stable state. Once it is completely dry to the touch, take your fine-grit sandpaper and begin the process of smoothing. Move in gentle, circular motions, feeling the texture change beneath your fingers. Your goal is to make the patch so seamless that the transition between the old wall and the new filler becomes virtually invisible to the eye.
- 5. Once the surface is smooth, a quick dusting is essential to remove the fine powder left by the sanding. If any dust remains, the paint will struggle to bond, much like a plant trying to take root in parched soil. After a light wipe, apply a primer if the patch is particularly deep or if you are moving from a very dark color to a light one. This acts as a primordial layer, preparing the canvas to receive its true identity.
- 6. Finally, we bring the color back to life. Using a small roller or a high-quality brush, apply your paint in thin, even strokes. If you are working on a large area, try to mimic the natural movement of the light in the room. Don’t rush to finish in one coat; two light applications will always yield a more profound depth and a more professional finish than one heavy, dripping layer. Watch as the color settles, turning a mere repair into a beautiful rebirth.
Gathering Your Drywall Repair Kit Essentials
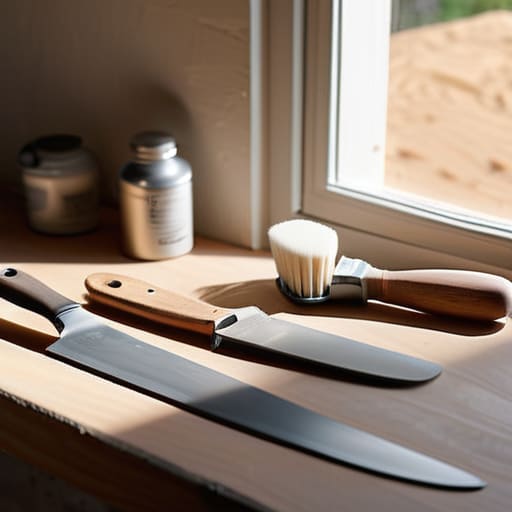
Before we begin the physical labor of restoration, we must curate our space with intention. I often find that preparing my tools feels much like preparing a canvas for a new sketch; there is a quiet, meditative rhythm in gathering exactly what is needed. To truly master the art of fixing holes in plaster walls, you shouldn’t just grab any old putty knife. Look for a selection of drywall repair kit essentials that feel intuitive in your hand—a small, flexible spatula for delicate work and a wider knife for broader strokes. Having the right instruments ensures that the transition from damage to smoothness feels less like a chore and more like a gentle reclamation of your home’s integrity.
As you assemble your kit, keep in mind that the secret to a seamless finish often lies in the subtle details of preparation. Beyond the compound itself, ensure you have high-quality sandpaper and a reliable sponge. Understanding how to sand drywall smooth is where the science of texture meets the artistry of the eye; you aren’t just removing bumps, you are sculpting a surface that invites light to rest upon it. Treat these tools not as mere hardware, but as the essential companions in your journey to mend and beautify your sanctuary.
The Sacred Art of Patching Cracks in Interior Walls
When I encounter a fissure in a wall, I don’t see a failure of structure; I see a quiet invitation to practice patience. Much like the delicate veins of a leaf I might find pressed between the pages of my favorite book, these cracks tell a story of movement and settling. Patching cracks in interior walls requires a gentle hand and a rhythmic approach. Before you reach for the compound, take a moment to widen the crack slightly with a utility knife. It sounds counterintuitive, but creating a small, clean channel allows the filler to settle deeply into the wound, ensuring the mend is as resilient as the foundation itself.
As you begin the filling process, remember that the goal is not just to cover the gap, but to reintegrate the surface into its whole. If you find yourself struggling with unevenness, don’t rush the drying process. Instead, focus on the subtle art of how to sand drywall smooth, using light, circular motions that mimic the soft breeze through a willow tree. This slow, meditative cadence ensures that when the light finally hits the wall, there are no shadows left behind to betray the repair.
The Alchemy of Finishing: Five Whispers for a Flawless Surface
- Patience is your most vital tool; much like waiting for a seedling to break through the soil, you must allow each layer of compound to dry completely before seeking the next level of smoothness.
- Respect the light by working with it, not against it; use a side-angled lamp to cast shadows across your work, revealing the tiny, hidden imperfections that a direct light might tenderly disguise.
- Embrace the rhythm of sanding, moving with a gentle, circular grace rather than forceful strokes, ensuring you treat the wall with the same lightness you would use when sketching a delicate fern in your journal.
- Prime your canvas with intention; applying a high-quality primer is the bridge between the raw repair and the final expression, ensuring your color settles with the depth and soul it deserves.
- Practice the art of feathering your edges, thinning the paint as you approach the repaired area so the transition becomes a seamless whisper rather than a visible boundary between old and new.
The Final Stroke: From Mending to Mastery
As we bring this journey to a close, I hope you see that patching a wall is more than just a sequence of technical tasks. We have navigated the delicate process of preparing the surface, the meticulous application of compound, and the patient waiting for things to dry. By carefully selecting your tools and honoring the rhythm of each layer, you have transformed a site of damage into a smooth, unified canvas. Remember, the secret lies in the transition—ensuring that the bridge between the old texture and your new coat of paint is so seamless that the eye can no longer find the seam where the healing began.
In the end, these small acts of restoration mirror the way we tend to our own inner landscapes. Just as we sand away the rough edges of a fractured wall to make room for vibrant new color, we must also allow ourselves the grace to mend our own cracks and start anew. Do not view these repairs as mere chores, but as an opportunity to reclaim your sanctuary. When you finally step back and see that perfect, fresh finish, take a moment to appreciate not just the beauty of the wall, but the quiet strength you found in the process of making it whole again.